

Tutorial: Quick and Easy Waterdrops with Corel Painter
Archive: Originally Published December 2008
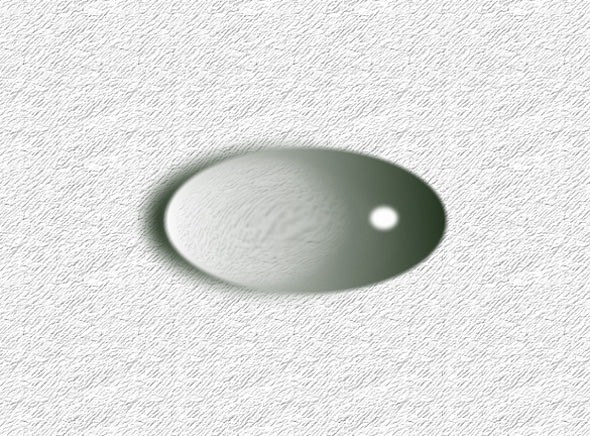
In this tutorial, you’ll learn how to make the very realistic-looking waterdrop shown above, and you will be surprised how fast and easy it is.
Step One
Start Corel Painter and create a new document at your preferred size. Insert a new, empty layer. You now have the canvas and an empty layer above it. In the toolbox, click on the Oval Selection tool (it’s nested with the Rectangle and Lasso Selection tools). Holding the left mouse button down, drag from left to right to create a small oblong, as seen here. To create a soft edge, go to the Select menu and choose Feather. Enter a value of 2 pixels and click OK.
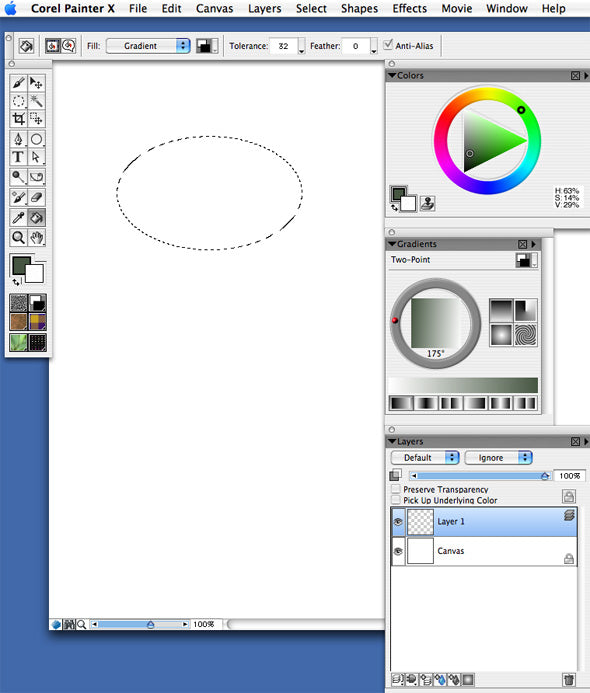
Select the Paint Bucket tool, and you’ll notice that the toolbar changes. From the drop-down, choose “Gradient” as your Fill type. Next to the Gradient drop-down, on the right, click on the icon to open the gradient presets.
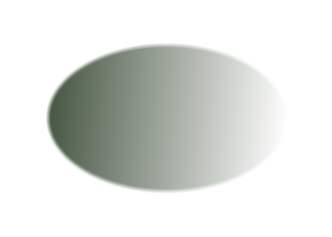
Make sure you have Two-Point chosen, as shown in Step One. In the Color Picker, choose a dark green as the background color and white for the foreground color. To open the Gradient tool, go to the Window menu and click on Library Palettes, then Show Gradients. You’ll notice that it creates a gradient using the colors you’ve chosen in the Color Picker. Move the red dot to the left center on the circle. There are four icons next to the circle. Click on the one in the upper left corner, Linear Gradient. There is a line of icons under the circle. Click on the first one, Left to Right Gradient. With the Paint Bucket chosen, click inside your oval selection once. Click CMD+D/CNTL+D to deselect.
Step Two
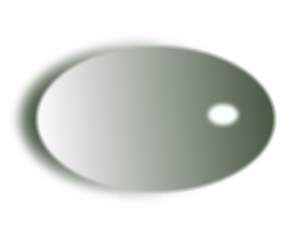
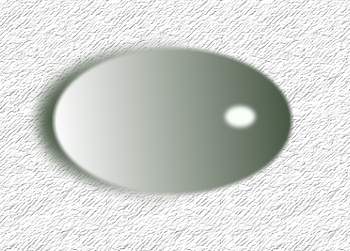
Double-click on Layer 1 and rename it “Shadow.” Now right-click the Shadow layer and select “Duplicate” from the menu that appears. This creates a copy of the layer and the oval. Rename this copy “Drop.”
Go to the Effects menu, select Orientation, and then Flip Horizontal. With the move tool selected, drag the Drop layer to the right until the shadow appears, as shown. With the Shadow layer selected, go to the Effects menu and choose Focus > Depth of Field. Use a value of about 15 for Minimum Size and 20 for Maximum Size. Use Image Luminance. This will blur the shadow edge nicely.

Step Three
With the Drop layer selected, use the Oval Selection tool to drag out a small circular highlight on the dark end of the oval. Drag the oval, use Feather to set the softness to 4 pixels. Now with the foreground color set to white, click inside this selection with the Paint Bucket.
Make sure the Paint Bucket is set on Current Color, not Gradient. At this point, you should have a pretty nice little waterdrop. But we can take it a step further. In nature, a waterdrop has a magnifying lens type of effect on the surface it lies upon. If we could mimic that, the drop would look even more realistic. Let’s keep going.
Step Four
Select the Canvas layer. Go to the Effects menu and choose Surface Control > Apply Surface Texture. This will make the canvas appear to have a 3D paper surface, using the currently selected paper type.
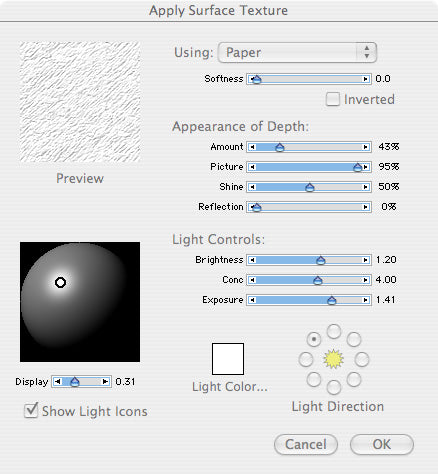
While this dialogue box is open, you can change papers and see them update in real time. To open the paper palette, go to Window, Library Palettes > Show Papers. Choose any paper you like, or just go with the one already selected.
Once you’ve got the paper set, change the Apply Surface Texture settings as shown, and click OK. This will affect the Canvas layer only. Our drop still looks rather plain. In the next step, we’ll make a final change that will turn this into one extraordinary little waterdrop.
Step Five
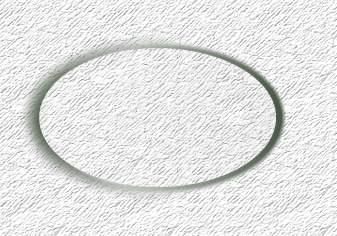
With the Canvas layer selected, drag an oval selection right on top of the drop, making a selection just a little smaller than the drop. Drag this selection away from the drop, so it is over the paper area. Copy and paste.
Drag this new layer until the oval-shaped paper is centered over the drop. Give this layer a name, like “Magnification.” With this new layer selected, go to the Effects menu and select Surface Control > Quick Warp. Choose the Bump option with a value of 0.8. Click OK. With the Magnification layer still active, grab the eraser, set on a fairly large setting, with a soft edge, at 50% opacity. Erase the right side of the oval on this layer. Towards the middle, reduce the opacity way down, and erase in a backward C shape, as shown. The edge should be gradual. Then, reduce the layer’s opacity to about 70%, or whatever looks good to you. You may want to keep going with the eraser at a low opacity until it looks right.

For more in-depth Photoshop tutorials and tips, check out our comprehensive Photoshop guide. For other photography tips and tricks, visit our Photo Mastery blog.


